How To Install Carpet
Carpet is incredibly versatile, available in a large selection of colors, styles, patterns, designs, and textures, making it a great flooring choice for many homes. Today's carpet is made with the latest advances in technology, so it is more durable than ever, making it a good flooring in busy homes with kids and pets.
Carpet can also suit any interior design style you choose, from elegant and sophisticated, modern and contemporary, to traditional and rustic. Carpet is best installed in rooms where you want an extra touch of comfort, such as your bedroom or living room.
Learning how to install your own carpet can seem challenging at first.
Installing carpet is more technical than some types of flooring, such as laminate or luxury vinyl, but it is not as technical as tile or hardwood flooring. It is possible for a person to install carpet in their own home, but it takes careful planning and specialized tools to avoid the carpet bulging or loosening over time.
In most instances, it's best to leave your carpet installation to professionals because of the amount of skill and specialized tools needed.
But, if you enjoy your own home renovation projects or you need to save money on the cost of your new floors, you can install your own carpet beautifully.
Before installing your carpet

Just like with any other flooring installation you need to prepare to install your carpet floors. You will need to make sure you have all the material and tools you need to do the job, then prepare your subfloors.
1. Gather your tools
Before you begin your installation project, you will need to gather your tools to complete the job. Installing your own carpet does require specialized tools, such as a carpet stretcher, that are a must for installing carpet as beautifully as a professional.
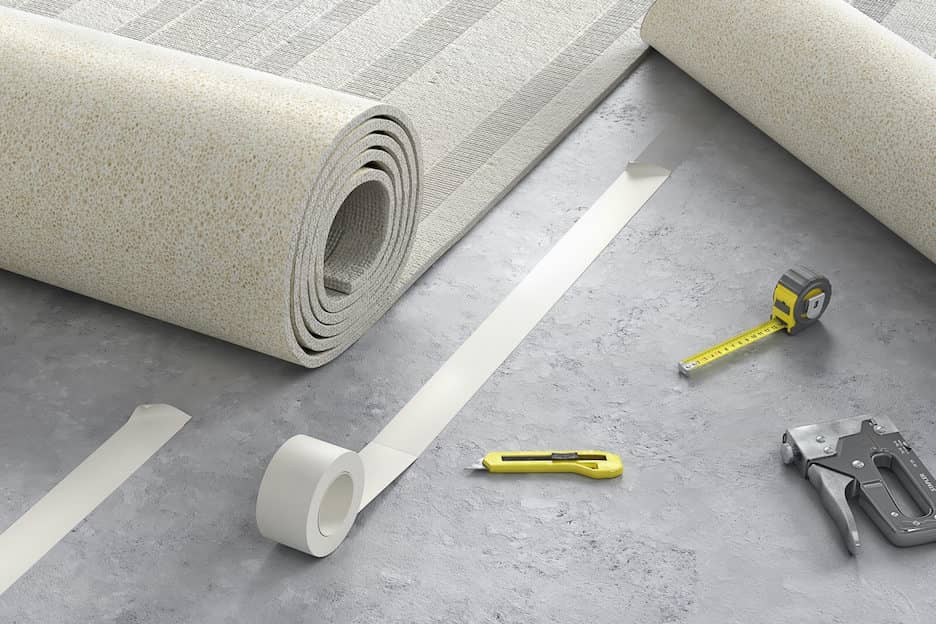
You'll need:- Tack strips.
- Staple gun.
- Utility knife.
- Chalk line.
- Tap measure.
- Duct tape.
- Seaming Tape.
- Knee pads.
- Knee kicker.
- Power stretcher.
- Rolling pin or carpet roller.
- Seaming iron.
2. Prepare for installation
Begin by measuring the size of your room to determine how much carpet and materials you'll need to purchase. The best practice is to buy approximately 10% more to ensure you have more than enough.
In addition to the carpet, you will need to buy carpet padding. Carpet padding is available in varying thicknesses, weights, and types so you can choose the one best for your carpet and your home. Your carpet padding provides insulation, additional comfort and support, and helps reduce sound in your home.
Remove any old flooring and preparing your subfloors, if needed. Subfloors should be free of cracks and should be clean to ensure an even floor. Remove any doors, including closet doors before beginning your installation.
If your previous flooring was carpet, you can leave the baseboards in place, but otherwise you'll likely have to remove them and replace them. Read your carpet manufacturer's recommendations for baseboards because many suggest installing them before laying your new carpet, leaving a gap for your carpet and padding. If your previous flooring was carpet, you can also most likely reuse the tack strips as long as they weren't damaged when you pulled up your old flooring.
Installing your carpet

Once the subfloor is ready you can begin your carpet installation. You will install your tack strips, your carpet padding, and then, your carpet.
1. Installing tack strips
The first step is to lay your tack strips. Tack strips are used around the perimeter of the room - with the exception of doorways and entryways - to provide an anchor for the carpeting. It is important to leave a gap between the tack strip and the wall so you can tuck the edges of the carpet over the strips. You will lay the tack strips, so the tacks are angled toward the wall to ensure they grip the carpet properly. To install tack strips on a wooden subfloor, nail them down. If you're installing carpet over concrete, you'll need to use an adhesive on the back of the tack strips.
2. Installing carpet padding
When you lay your carpet padding, you'll want the underlay sections perpendicular to the direction you're laying your carpet. You will not place the padding over the tack strips; instead, the padding will go right up to the edge of the strips. Place your carpet pad down and fit it to the length of the room. Use a carpet trimmer or sharp utility knife to cut the padding so that it fits.
If your room is wider than the width of your carpet padding, you will have seams where the two pieces meet. Tape these pieces together with thick masking tape, duct tape, or as recommended by the manufacturer. Your padding should cover the entire area you plan to cover with carpet, aside from the tack strips.
Once you have your carpet padding in place and the seams taped together, you are reading to secure your carpet padding. Use a staple hammer-tacker to fasten the carpet pad to the edges of the tack strip, then trim any access. Staple the carpet pad at the seams, alternating so the staples are not side by side on each piece of padding. If you are installing your carpet over concrete subfloors, consult your manufacturer's guide for the recommendation for carpet adhesive. It's a good idea to use a synthetic fiber underlay on concrete so any moisture does not soak into the carpet.
3. Cut and lay the carpet
You have to be careful cutting your carpet strips because if you cut them too short, you will waste the entire strip. So before laying your carpet measure the length strip you need carefully, and then add an extra 6 inches to the measurement. Notch the back of your carpet with a knife at that measurement, and then snap a chalk line across the backing. Cut along your chalk line using a straightedge to guide your cut. For the best results, use a sharp blade.
As you begin working, pay attention to which direction the carpet pile is facing. You want all your pile facing the same way. If you are installing patterned carpet, be careful to align your patterns so there isn't a visible break in the carpet. Remember to keep your carpet seams at right angles to the padding seems. You'll also want to keep about three inches of extra carpet next to your walls as you work. When you lay carpet in corners, make relief cuts so the carpet lies flat.
Check that your adjoining edges of carpet are straight and touching but not overlapping. Use heat-activated seaming tape where the two pieces of carpet meet. Place it under your pieces of carpet and ensure the seam is tape is tight for the entire length of the carpet, and then follow the tape manufacturer's guides for using your heated seaming iron to activate the adhesive and seal the seam. Use a carpet roller to press the pieces of carpet together and complete the seam.
Use your knee knicker by placing it three inches from a long wall near a corner of the room. Use it to push and hook the carpet into position on the tack strip moving along the wall pulling any slack or wrinkles out of the carpet as you attach it to the tack strips.
Now that you've secured the carpet to the first wall, move to the opposite wall and use a carpet stretcher to stretch your carpet. You want to pull the carpet tight, removing any wrinkles or bunches. Reach in front of your stretcher to hook the carpet down onto the tack strips. Move around the wall stretching the carpet in sections.
You will trim excess carpet and tuck the edges under the baseboards. Repeat this process for the remaining walls. Cut carpet around any vent openings and doorways to ensure the edge will be centered under a closed door. Place your transition strips at all thresholds where carpet meets another type of flooring. Now you can replace your doors, and your carpet installation is complete.
After installing your carpet

After finishing your carpet installation project, you may want to run a fan or open windows to remove any smells associated with your new flooring.
It's a good practice to stay off your new carpet to let it settle for a day or so before cleaning or placing furniture back in the room. Then you're free to enjoy your newly carpeted floors!
Looking to buy new carpet? Contact Stine Home today or visit one of our locations throughout Louisiana!